Latest Posts
- Instant Pot vs Ninja Foodi: Which Multi Cooker Actually Wins in 2026?
- Best Budget Mini Electric Pressure Cookers for Students & Small Families (2026 Edition)
- Smart Coffee Makers Explained Honestly: What Actually Works, What Fails, and When Simple Coffee Machines Win
- Smart vs Manual Blenders Explained: How to Choose the Right Blender for Real Home Use
- Best Smart Air Fryers (2026 Reviews): Take the Guesswork Out of Cooking with Smart Presets
Other Categories
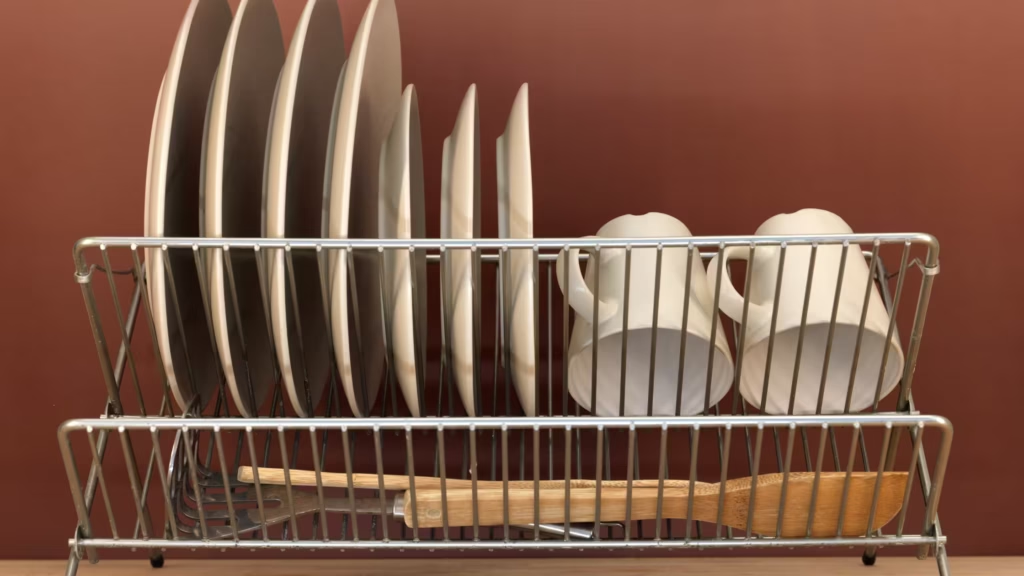
Annoying Dish Rack Issues? Simple Solutions Inside!
-
 Waqas Ramzan
- June 25, 2025
- Storage and Organization
In this Aticle
Dish racks are essential in every kitchen, but they’re also one of the most overlooked items until they start causing daily frustration. Whether its mold, rust, or a complete lack of space, dish rack problems can throw off your whole cleaning routine. The good news? You don’t have to live with it.
In this article, we’ll dive into the most common dish rack issues and provide clear, simple fixes. You’ll also learn how to choose the best dish rack for your needs and keep it running like new for years. Let’s discuss how you can maintain, setup, and can get an idea to buy dish rack.
Some dish racks are poorly made — but others are built to last. If you’re shopping for a better one, check out our top-rated dish rack recommendations tested for durability and design.
| Problem | Cause | Quick Fix |
|---|---|---|
| Rusting metal frames | Dampness, peeling coat | Use anti-rust materials; dry after use |
| Mold/mildew buildup | Poor airflow, water pooling | Clean weekly; improve airflow |
| Warped/discolored plastic | Heat, bleach, sunlight | Keep cool; use soft cleaners |
| Inefficient space | Flat design, no dividers | Use tiered or over-sink rack |
| Poor drainage | Flat base, bad slope | Use tilted tray or angled board |
| Peeling + rusting | Overload, harsh washing | Use stainless steel or bamboo |
| Hard water crust | Mineral buildup | Clean with vinegar; use soft water |
| Short life span | Cheap material, wrong size | Invest once in quality |
| Mold/warping risk | Moisture trapped daily | Dry daily; rotate racks |
Common Dish Rack Problems and Practical Solutions
Rusting Metal Frames
Metal dish racks look sleek but often fall victim to rust especially when the coating starts to peel. Rust can leave the marks on you cutlery, utensils, dishes etc also it is harmful for rack structure. Rust usually forms when the rack stays damp for long periods or when cheap materials are used.
To avoid this, choose racks labeled as “anti-rust” or made from high-grade stainless steel. After each use, give it a quick towel-dry, especially at the joints where water pools.
Quick Fixes:
- Choose anti-rust rack materials like steel, coated wire or metal.
- Dry the rack thoroughly after each use.
- Use a rust-preventive spray for extra protection.
Mold and Mildew Buildup
If your dish rack constantly smells musty or feels slimy, you’re likely dealing with mold or mildew. This not only looks gross but also poses a hygiene risk in your kitchen. The worst part? Mold or rust grow on the rack in using worst condition.
Combat it by cleaning your rack weekly with natural solutions like vinegar. Also, make sure there’s good airflow and no water sitting at the base for long periods.
Simple Solutions:
- Clean weekly with vinegar or baking soda.
- Ensure airflow around the rack.
- Never let water pool at the base.
Warped or Discolored Plastic
Plastic racks are budget-friendly but prone to warping and yellowing over time especially when exposed to heat or harsh cleaning agents. Once warped, dishes start tipping over and the rack becomes useless for proper drainage.
To maintain longevity, avoid placing hot items on the rack and keep it out of direct sunlight. Wipe, Clean slightly using soft and smooth cloths and mild detergents.
How to Avoid It:
- Avoid placing hot pots directly on plastic racks.
- Keep it out of direct sunlight.
- Use gentle cleaners no bleach or abrasive sponges.
Inefficient Space Usage
Ever feel like your dishes are in a shaky circus act on the rack? This signals it’s time for a better solution. Many dish racks don’t use vertical space well or lack dedicated areas for utensils and cups.
Look for a dish rack organizer with multi-tiered designs or add-on compartments. These maximize storage without making your kitchen feel cramped.
Try This:
- Investing in a tiered dish rack is good idea.
- Use utensil drying organizer inserts to separate forks from knives.
- Install an over-the-sink design to save countertop real estate.
Poor Water Drainage
A common source of frustration is water pooling under your dish rack. It not only leads to mold but also makes your countertop constantly wet and messy. Due to unorganized drainage design, unnecessary water can fill the rack, which will not only waste your washing effort but also keep your countertop wet.
To prevent water buildup, use a rack with a tilted drain board that returns water to the sink. Alternatively, place a microfiber drying mat underneath for better absorption.
Smart Fixes:
- Tilt the rack slightly toward the sink.
- Use a rack with an angled drain board.
- Clean the drain spout regularly.
Plastic Wear Off, Metal Rusting
Sometimes it feels like you can’t win your plastic coating is peeling, and the metal underneath is rusting. This combo is a double whammy, leaving your rack looking shabby and unstable.
This usually happens when racks are overloaded or cleaned with harsh chemicals. Switch to an anti-rust dish drying rack made entirely from durable materials like stainless steel or bamboo for peace of mind.
Best Tip:
- Better to go for steel, metal, wired or bamboo rack.
- Don’t overload the rack; excess pressure causes quicker damage.
Avoid dishwasher, wash with hands.
White or Yellow Crust Formation
That flaky crust forming on your dish rack isn’t just ugly it’s mineral buildup from hard water. Over time, it can damage your rack and even transfer residue onto your clean dishes.
To get rid of this, soak the affected areas in white vinegar and scrub with a toothbrush. For prevention, dry your rack regularly and rinse it with distilled water once a week.
Quick Cleanup:
- Wipe down with a vinegar-soaked cloth.
- Rinse thoroughly after each wash.
- Install a softening filter if hard water is a chronic issue.
Material Life and Space Issues
Not all dish racks are built to last. Cheaper plastic ones may crack or discolor within months, and poorly designed racks don’t hold enough to meet your needs. It’s a waste of money and space.
Don’t just grab the cheapest rack, pick the right size and material. You’ll save money (and frustration) in the long run.
Pro Advice:
- Invest once in quality. Don’t replace every year.
- Pick something that matches your family size and dish habits.
- Apply beeswax, people use usually to seal them.
How to Prevent Mold and Warping
Prevention is always easier than cure especially with dish racks. Mold and warping can be kept at bay with a few simple daily habits. Apply few tricks to maintain and proper draying techniques.
After each use, empty the drain tray and wipe down the rack. Try to place in ventilated area while using fan.
Basic Routine:
- Always empty excess water.
- Keep it dry between uses.
- Rotate between two racks if you use them heavily.
If your current rack is beyond saving, don’t worry — we’ve curated the 8 Best Durable & Stylish Dish Racks You Can Buy for every kitchen type and budget.
| Benefit | Why It Matters |
|---|---|
| Saves space | Turns chaos into clean layout |
| Speeds drying | Less moisture; faster clean-up |
| Reduces contamination | Items don’t touch each other |
| Cleaner & safer kitchen | No water mess = fewer pests |
| Protects cookware | Prevents cracks or mildew |
Key Benefits of an Optimized Dish Rack Setup
Saves Space Efficiently
A well-designed dish rack turns chaos into order, making small kitchens feel roomier. Over-the-sink designs are especially helpful in apartments and tiny homes. It’s all about making the most of your vertical and horizontal space.
- Turns chaos into order for small kitchens
- Over-the-sink designs maximize space
- Uses vertical and horizontal space effectively
- Detachable components adapt to dish loads
Choose racks with detachable components that can adapt to your daily dish load. Smart design = smarter kitchen.
Speeds Up Drying Time
Good air circulation means dishes dry faster, which reduces water spots and speeds up your overall kitchen routine. The faster your dishes dry, the sooner you can put them away.
- Good air circulation dries dishes faster
- Reduces water spots
- Lets you put dishes away sooner
- Spaced-out slots improve drainage
- Prevents damp cutlery smells
Look for racks with spaced-out slots and drainage boards that channel water away. No one likes the smell of damp cutlery.
Reduces Cross-Contamination
Hygiene is a big deal in the kitchen, and a poorly organized rack can let germs hop from item to item. Utensils and plates that touch each other can spread bacteria and make your cleaning efforts useless.
- Prevents germ transfer between items
- Stops bacteria spread from touching utensils
- Separate compartments keep kitchenware clean
- Smart separation improves hygiene
Go for a rack that separates compartments for different types of kitchenware. Cleanliness starts with smart separation.
Keeps Kitchen Cleaner and Safer
Water pooling around your sink area can damage wood, invite pests, and make things slippery. A tidy, efficient rack keeps things dry, contained, and safe.
Plus, a clean-looking rack just makes your kitchen look instantly better like a small makeover without any renovations.
- Prevents water from pooling around sink or counter
- Avoids wood damage, mold, and pest attraction
- Reduces slipping hazards from excess moisture
- Keeps everything tidy and contained
- Instantly improves kitchen’s visual appeal—like a mini makeover
Enhances Longevity of Cookware
Cookware that’s stacked improperly or dries unevenly tends to chip, crack, or grow mildew. A quality drying rack protects your investment by giving each item the space and air it needs.
Proper air drying also reduces the need for towels, which can sometimes reintroduce bacteria. Let your dish rack do the heavy lifting.
- Prevents chips, cracks, and mildew from improper stacking
- Allows each item to air-dry with enough space
- Minimizes need for towels (which may carry bacteria)
- Helps maintain non-stick coating, sharp edges, and polish
- Protects your cookware investment in the long run
| Factor | Options | Tips |
|---|---|---|
| Material | Steel, bamboo, plastic | Steel = durable; bamboo = eco |
| Size | Compact, 2-tier, family-size | Match family needs + counter space |
| Design | Over-sink, countertop | Over-sink saves space |
| Features | Utensil holders, hooks, drain tray | Pick what solves your problem |
| Maintenance | Simple design, easy clean | No rust traps or complex parts |
How to Choose the Right Dish Rack: A Complete Buying Guide
Material: Durability & Hygiene
Material matters. Stainless steel resists rust and looks modern, while bamboo adds a touch of eco-friendliness with natural mold resistance. Plastic is lightweight but tends to wear out faster.
Think about what works best for your kitchen conditions and how much maintenance you’re willing to do.
Best Materials:
- Stainless steel: Durable and rust-resistant.
- Bamboo: Natural and mold-resistant (when treated).
- Plastic: Lightweight, but choose BPA-free and high-quality.
Size: Match Your Needs
Don’t buy a jumbo rack if you only cook twice a week. But if you’ve got a big family or love to entertain, size definitely matters. A small rack will just create daily frustration.
Measure your counter or sink space before shopping, and choose a model that fits your lifestyle—not just your countertop.
- Solo or couple? Go compact.
- Family of 4+? You’ll need at least a two-tier rack.
Design: Over Sink vs. Countertop
Over-the-sink dish racks are ideal for saving counter space and letting water drip straight into the sink. Countertop versions offer more flexibility and come in different shapes.
- Over-sink racks save space and drain directly.
- Countertop racks give more flexibility but may take up valuable prep area.
Consider your kitchen layout and how much space you want to free up before deciding.
Features to Look For
Modern dish racks come with a ton of handy features like utensil compartments, wine glass holders, cup hooks, and extendable trays. These aren’t gimmicks they actually make life easier.
- Utensil holders
- Cup holders
- Drainboards
- Anti-slip feet
- Foldable designs
Choose a model that solves your current pain points instead of just looking good in the product photo.
Maintenance Needs
Some racks are a pain to clean lots of tiny crevices, complicated assembly, or fragile parts. Make sure yours is easy to disassemble and wipe down.
Step-by-Step Maintenance and Cleaning
| Routine | Task | How Often |
|---|---|---|
| Daily | Wipe rack, empty tray | After every use |
| Weekly | Clean with vinegar; scrub joints | Once per week |
| Monthly | Check rust, cracks, wobble | Every month |
Daily Wipe-Down Routine
Make it a habit to wipe down your dish rack with a dry towel after the dishes are done. This simple act prevents mold and keeps your rack in good condition. It only takes 30 seconds but saves you hours of cleaning later.
- Once dishes are dry, give the rack a quick wipe with a dry towel.
- drain out any water stored in the tray.
Also, be sure to empty any water that collects in the tray underneath.
Weekly Deep Cleaning
Once a week, let your rack soak in warm water with vinegar – an easy way to melt away residue. Scrub the corners and slots with an old toothbrush.
- Soak in warm water with vinegar.
- Use a toothbrush to scrub joints and corners.
- Rinse and air-dry fully before reuse.
Wash it clean and wait until it’s totally dry before using it again.
Monthly Inspection for Damage
Do a monthly checkup: look for rust, cracks, or wobbly parts. These small issues can quickly grow into big problems if ignored.
- Check for rust spots, cracks, or warping.
- Replace if there’s significant damage especially to joints or supports.
If anything feels wobbly or looks suspect, it’s probably time for a replacement.
Mistakes to Avoid with Dish Racks
| Mistake | Why It’s a Problem |
|---|---|
| Overloading rack | Breaks, poor drainage |
| Not draining tray | Causes mold fast |
| Using harsh cleaners | Damages surface coatings |
| Ignoring rust or mold | Problem grows quickly |
- Don’t overload it with more dishes than it can handle.
- Pro tip: Dump the tray water often to prevent mold growth.
- Never use bleach or steel wool; they’ll harm the rack’s surface.
- Never ignore the early signs of rust or mildew. Fix it before it spreads.
Following these care steps will help extend your dish rack’s life — but if it still gives you trouble, check out our recommended dish racks built for durability.
Conclusion: Simplify Your Kitchen Life
A clean and efficient dish rack might seem like a small thing, but it makes a big difference in your daily kitchen routine. By understanding common issues and implementing simple fixes, you’ll extend the life of your rack and keep your space hygienic and organized.
Remember, your kitchen should work for you not the other way around. Start with the dish rack, and everything else starts falling into place.
Frequently Ask Questions?
How to clean dish rack naturally without chemicals?
Use white vinegar and baking soda. Let it soak, scrub with a brush, rinse well, and air dry.
What is the best dish rack material for humid climates?
Stainless steel or bamboo with anti-mold treatment holds up well in humid areas.
How to prevent mold on dish racks long-term?
Clean it weekly, empty drain trays daily, and allow full air-drying after each use.
What’s the best way to organize dish rack for a large family?
Multi-tiered racks with adjustable components let you separate dishes, glasses, and utensils easily.
How to install over sink dish rack securely?
Measure your sink space, follow the manual, and ensure all grip pads or screw joints are tightly secured.